
Add User Authentication With Devise
Created by Piotr Steininger, @polishprince
Compiled for Rails Girls KL by Faezrah, @fzrhrs
This guide assumes that you have already built a Rails Girls app by following the extended app guide.
1.Add Basic User Authentication
Now that you have a basic instagram clone, it would be nice if there is a way to let users sign up and sign in.
To do this, we need to install an additional gem to help us handle the user registration process.
2.Add and Setup Devise In Your App
Open Gemfile and add this line:
gem 'devise'Next run this in the terminal:
$ bundle installOnce it's done, still in the terminal, run:
$ bin/rails g devise:installThis command will generate everything we need to handle the registration flow.
Restart the Rails server if everything works well.
$ bin/rails server -b 0.0.0.03.Configure Devise
Next, open up app/views/layouts/application.html.erb and type:
<% if notice %>
  <p class="alert alert-success"><%= notice %></p>
<% end %>
<% if alert %>
  <p class="alert alert-danger"><%= alert %></p>
<% end %>
Before this line:
<%= yield %>This code will display alerts and notices for our application, to slightly improve the user experience.
Mentor: Talk a little bit about user authentication and Devise.
4.Setup User Model
Because we want to save users to our database, we need to create a model to handle just that.
$ bin/rails g devise UserRemember we need to run a migration to tell Rails to save the changes in the database.
$ bin/rails db:migrateMentor: Explain what user model has been generated. What are the fields?
5.Create Your First User
Now that you have set everything up you can create your first user. Devise creates all the code and routes required to create accounts, log in, log out, etc.
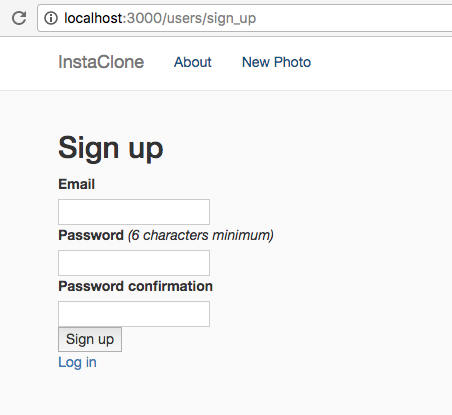
Make sure your rails server is running, open http://localhost:3000/users/sign_up and create your user account.
Checkpoint: If everything works well, your sign-up page should look something like this:
6.Add Sign-up And Login Links
All you need to do now is to add appropriate links or notice about the user being logged in in the top right corner of the navigation bar.
In order to do that, open app/views/layouts/application.html.erb and type:
<% if user_signed_in? %>
  <li><%= link_to 'Edit profile', edit_user_registration_path %></li>
  <li><%= link_to "#{current_user.email}, logout?", destroy_user_session_path, method: :delete %></li>
<% else %>
  <li><%= link_to "Sign up", new_user_registration_path %></li>
  <li><%= link_to "Login", new_user_session_path %></li>
<% end %>
Make sure you add the code, right after:
<ul class="nav navbar-nav">
  <li><%= link_to "New Photo", new_photo_path %></li>
</ul>
Mentor: Talk about the user_signed_in? and current_user helpers. Why are they useful?
7.Authenticate User
Finally, add a function to force user to sign up or sign in before they can upload photos on our Instaclone application.
To do that, open up app/controllers/photos_controller.rb and add the following:
before_action :authenticate_user!, except: [:index, :show]After the first line, which is:
class PhotosController < ApplicationController7.User And Photo Associations
Let's think for a moment.
Now that we have a User model in our application, we can then modify our Photo model so that a signed-in user can upload photos, retrieve their photos, and display their name next to the photos just like Instagram.
To achieve this, first -- we will need to add an additional column to our Photo model.
Run this in the terminal:
$ bin/rails generate migration AddUserIdToPhoto user_id:integer$ bin/rails db:migrateNow, we need to tell Rails the relationship between the two models.
Open up app/models/user.rb, and add this code:
has_many :photos, dependent: :destroyCheckpoint:
My user.rb looks like this:

Next, in photo.rb, add this code:
belongs_to :userBelow:
mount_uploader :file, PhotoUploaderWe do this because we need to explicitly tell Rails about the associations between the two models, otherwise Rails will return an error.
In our create action in app/controllers/photos_controller.rb replace this code:
@photo = Photos.new(photo_params)With:
@photo = current_user.photos.new(photo_params)This code basically means we want to tie the photo with the current user logged-in.
Now we have the association setup between the two, play around the app to test if it works.
Lastly, on our app/views/photos/index.html.erb, replace the hard code name to user's email, like so:
<h4 class="name">
  <%= photo.user ? photo.user.email : "RG Malaysia" %>
</h4>
Don't forget to do the same in app/views/photos/show.html.erb:
<h4><%= @photo.user ? @photo.user.email : "RG Malaysia" %></h4>Mentor: Talk a little bit about model associations in Rails.
8.Adding More Features
You now have a basic instagram clone application. Next, you can enhance your app by adding comment to photos.